Week 1 - Intro & Setup
Introduction to JS and Web Dev Tools
Section titled “Introduction to JS and Web Dev Tools”JavaScript Background
Section titled “JavaScript Background”The language “JavaScript” was originally called “LiveScript” and was developed by Brendan Eich in 1995 for the Netscape 2 browser. In 1997 ownership of JavaScript was handed over to the EuropeanComputer Manufacture’s Association (ECMA).
Core JavaScript is based on a standard called ECMAScript or ES, for short. In recent years there has been an official update to the standard every year. In 2015, there was a large update to the standard. This was the 6th major version of JavaScript and was called ES6. It added a LOT of new features to the language. Sometimes ES6 it is called ES2015. There have been updates every year since then.
You will see many references online to courses that teach ES6 or ES6+. This is loosely interpreted as modern javascript.
If you ever want to see the features that are being tested and considered you can visit the Github site for the ECMA Technical Committee 39 (TC39) (⌘ + click) to open. Inside you will find a list of repositories. One for each proposal plus other things.
When a new feature is proposed it goes through stages.
- 0: proposal presented or planned
- 1: Being considered. List of Stage 1
- 2: Under active development. List of Stage 2
- 3: Testing and feedback of a developed feature. List of Stage 3
- 4: Ready to become part of ECMAScript standard.
One example is the new proposal for a new datatype for dates and times called Temporal. Here is the repository for the Temporal proposal. It is currently in stage 3.
What is Core JavaScript?
Section titled “What is Core JavaScript?”ECMAScript is the standard that defines the capabilities of a programming language.
JavaScript is the actual language which is the implemented version of ECMAScript.
There are different JavaScript Engines that are used to interpret and run the JavaScript files. The two most prevalent are V8 Chrome from Google and Webkit from Apple. The V8 Chrome engine is used inChrome, Edge, Opera, Brave, and NodeJS, as well as a number of other smaller browsers and embedded systems. V8 Chrome has the most active development and supports the most standards and features.
Webkit is the engine used by Safari and is the only allowed JS Engine on any iOS devices. Unfortunately, this means that even if you are running Chrome or Firefox on an iOS device, you are stuck with the Webkit engine. 😡 Webkit has lagged behind in its feature development for many years. Apple makes a big deal of announcing when they add support for new CSS properties ahead of the other browsers. Unfortunately, they have worked for years to prevent the web from supporting things that could take business away from their App Store.
In this course, and this program, you will be learning to write JavaScript for both NodeJS and the browser.
Core JavaScript is the part of JS that would be common to the language regardless of where it is running. It is made up of the features like variables, if statements, functions, data types, arrays, loops, ternary operators, the Math object. JS can be running in a browser, on a web server, or embedded in a drone. There are many features, like updating the content on a webpage, that a browser needs but a webserver or a drone do not.
NodeJS is a program that can run on any computer. It contains the Core JavaScript from the V8 Chrome engine plus additional features that would be needed by a web server or a computer running command line type programs or interacting with other programs on the server.
JavaScript in the browser has Core JS plus the HTML5 APIs. These HTML5 APIs are JavaScript commands and features that can be used for all the additional things that a browser would need - managing web page history, caching files, uploading files, geolocation, local data storage, talking to remote apis, and more.
Here you can find a list of the HTML5 APIs (⌘ + click) to open.
Tools That You Will Need
Section titled “Tools That You Will Need”VS Code
Section titled “VS Code”Visual Studio Code, or VSCode, is the Integrated Development Environment (IDE) that we will use for ALL of our web development. VS Code has become the industry standard for web development. While there are people who use other IDEs like Atom or WebStorm or others, and they will loudly defend their choice, we will be using VSCode as our standard tool due to the embedded terminal, git support, and the large number of extensions that will make development much easier for you and for us to support.
If you want to use a different IDE for your web development, that is fine, but we will not be able to support you when you have problems with your environment.
Download VSCode (⌘ + click) to open
VSCode Extensions
Section titled “VSCode Extensions”When you have time, here is the list of extensions that we recommend you install to start.
- Live Server (Ritwick Dey)
- ESLint (Microsoft)
- Prettier (Prettier)
- Code Spell Checker (Street Side Software)
- Live Share (Microsoft)
- Path Intellisense (Christian Kohler)
- Svg Preview (Simon Siefke)
- TODO Highlight (Wayou Liu)
- vscode-icons (VSCode Icons Team)
- YAML (Red Hat)
- W3C Web Validator (Celian Riboulet)
- ES7+ React/Redux/React Native (dsznajder)
Some optional extra extensions that you may find useful
- Color Manager by Roy Action - adds extra functionality for editing colors
- Color Highlight by Sergii Naumov - highlights colours in code with the color (keywords, hex values, hsb, etc.)
VSCode Theme and Font
Section titled “VSCode Theme and Font”And the font that I use in VSCode is JetBrains Mono. You can download it from here (⌘ + click) to open. To update the font being used, install the font in MacOS by opening the downloaded font and click the install button. Then, in VSCode, Code > preferences > Settings and search for Font Family. Look for Editor: Font Family and put ‘JetBrains Mono’, at the front of the list.
NodeJS and NPM
Section titled “NodeJS and NPM”NodeJS and NPM come together as a single install. NodeJS is the program that contains the JavaScript Engine. NPM is the package manager that we will be using later on.
Install the LTS version of NodeJS (⌘ + click) to open, or the Current version, if the Current version is an EVEN number (eg: 20, 22, 24). LTS stands for Long-Term Support. The current version is often an experimental version where new features are tested. 10 years ago NodeJS was experiencing rapid development and lots of features were being updated. At that point we wanted the dev version. Now, the LTS version is the best for our purposes and it is what you will use in industry.
NVM Node Version Manager, is a tool that we can use to install and run multiple versions of NodeJS on the same computer. Sometimes you will be working on different projects that have different requirements. Because of the other software and libraries that you are using in a project, you might need to have different versions of Node installed.
NVM is a tool that allows us to install multiple different versions of Node and then, from the Terminal, toggle back and forth between the versions. The installation instructions are here.
Basically, we just run this command in the Terminal.
curl -o- https://raw.githubusercontent.com/nvm-sh/nvm/v0.40.3/install.sh | bashOnce NVM is installed, then we use it to download and install Node. To check if it is properly installed we can check its version number with this command:
nvm -vTo install specific versions of node type a command like the following. Replace the number with the exact one that you want. The last line will get whatever the LTS version of Node is, and install that.
nvm install 14.7.0nvm install 24.5.0nvm install 22.18.0nvm install ltsAfter you install the version(s) that you want, then you will want to pick which one is the default. This will be the version of Node that runs every time you open a new Terminal window. Again, just replace the number with the version that you have installed and want to make default.
nvm alias default 24.5.0To see all the installed versions, run the following:
nvm lsAfter installing multiple versions of Node through NVM you will need to be able to toggle between then. This command lets to specify which one you want to make active.
nvm use 22.18.0NPM Setup
Section titled “NPM Setup”Once you have installed NodeJS, there is one configuration that you should do from the command line that will help you avoid permission issues when using NPM to install modules and packages later on.
If you have installed NodeJS directly (without NPM) then open your Terminal app on MacOS and run these commands.
cd ~mkdir ~/.npm-packagesnpm config set prefix ~/.npm-packagesThis will create a new folder called .npm-packages inside your own user folder and then make it the default location for anything that you globally install with npm.
You might be wondering why the folder name starts with a period. On MacOS this makes it a “hidden” folder. If you want to be able to see any “hidden” folders when browsing in Finder and in the Terminal, see the section below called Hidden Pages to learn how to show them.
If you have used nvm to install NodeJS, then it will be automatically creating the folder for the npm globally installed packages. You can see the location of this created folder by running the following command in your Terminal.
npm config get prefixFor each version of Node that you have installed with nvm, there will be a folder created for the global npm packages.
The updated version of Git from GitSCM (⌘ + click) to open, can be installed using a variety of tools. The easiest is with a tool called HomeBrew (⌘ + click) to open. You will need to install HomeBrew first. Then you can re-open your Terminal and install Git using HomeBrew.
First installing HomeBrew from Terminal.
/bin/bash -c "$(curl -fsSL https://raw.githubusercontent.com/Homebrew/install/HEAD/install.sh)"Then installing Git using HomeBrew in your Terminal.
brew install gitGithub
Section titled “Github”Create a Github (⌘ + click) to open, account using your @algonquinlive email address.
Your username needs to match your algonquin username. This is the 4 letter + 4 number username like bond0007.
If you already have a Github account with a different username, that is fine. Keep that one. You will use it outside school. We want you to have an account that your teachers can find for all your assignments and projects.
Oh My ZShell
Section titled “Oh My ZShell”ZSH is the current recommended version of the Terminal on MacOS. We recommend that you also install a program called Oh My ZShell (⌘ + click) to open. It adds plugins, colours, features, and formatting to your terminal environment.
It will create a file in your user folder called .zshrc which will be use later on to set up your development environments for mobile.
sh -c "$(curl -fsSL https://raw.githubusercontent.com/ohmyzsh/ohmyzsh/master/tools/install.sh)"Browsers
Section titled “Browsers”Here is the list of browsers that you need to install. Why so many browsers? As web developers you need to be able to test what you build in the environment that is used by your clients.
Chrome and/or Chrome Canary. This needs to be your default browser. Set it as your default browser when you launch it for the first time. Seriously. Do it. Make it your default. I’m not kidding. We will be using the developer tools that come with Chrome. Install it. Open it. Make it your default browser. Why are you still reading this? Go. Do it now. Make it your default. This page will still be here after you have done it. Go. Now.
Firefox Developer Edition (⌘ + click) to open.
Safari Technology Preview (⌘ + click) to open.
Microsoft Edge Dev (⌘ + click) to open.
Opera Developer (⌘ + click) to open.
Most of the above browsers are the developer versions. This means that you will have a browser that is one version ahead of the rest of the world. All those muggles will be using the standard versions. Not you.
You should install the Slack APP and make sure you can see all the channels for your courses. You can install the Slack app on your phone as well as your MacBook Pro.
Hidden Files on Mac
Section titled “Hidden Files on Mac”MacOS likes to hide files and folders that hold things like settings. While this might be a great thing for your average user, as developers it is a frequent source of annoyance.
What makes a file hidden? If the name of the file or folder starts with a period then it will be treated as a special hidden file or folder.
So, here are a few things that you can do to avoid the problem.
-
A short term solution that lets you show hidden files in any Finder window is to hit
CMD + SHIFT + .. This key combination will toggle the appearnce of any hidden files. -
A permanent solution that does the same thing in all Finder windows is to open a
Terminalwindow and run the following two commands.
defaults write com.apple.Finder AppleShowAllFiles truekillall FinderIt will change the setting so hidden files are shown by default in Finder and then restarts Finder.
- VSCode, on MacOS, also likes to hide folders and files whose name starts with a period. We can change this setting too. In VSCode, go to
Code > preferences > settingsand search for “hidden”. If you have the extensionPath Intellisenseinstalled then there will be a checkbox to Show hidden files.
If you do NOT have the Path Intellisense extension installed then you can search, in settings, for “exclude”. You will see a section titled “Files: Exclude”. Click the Add Pattern Button and type
in the names of any hidden files or folders that are showing, and that you want to hide in your projects. Eg: **/.git and **/.gitignore.
Directory Structure for Class
Section titled “Directory Structure for Class”Non-developers tend to save their files on the Desktop so that they know where to find them later. This might work well for your mom when she is saving recipes but it is not good practice for developers.
We will create a common directory structure for everything that we do so you will always be able to locate the THOUSANDS upon THOUSANDS of files that you will be creating over the next two years.
MacOS has a Documents folder that you will see in Finder. Inside Documents, create a folder called code (or courses, class, school, madd, algonquin, or something that you will recognize and remember.) Whatever the name is, keep it short and easy to type. Inside the code folder create a single folder for each of your courses. I prefer using the course codes because they are quick and easy to type. mad8010, mad9011, mad9013, mad9014 and mad9112 are your course codes for first semester. We use the course codes because they are quicker to type than the names of the courses AND they have no spaces in the names. This will be important later.
DirectoryDocuments/
Directoryclass/
Directorymad8010/
- …
Directorymad9011/
- …
Directorymad9013/
- …
Directorymad9014/
Directoryweek1/
- index.html
Directoryweek2/
- index.html
Directorymad9112/
- …
You now have a place where you can put content for each course.
Inside the mad9014 and mad9013 folders I would recommend adding two more folders - weeks and assignments. The first folder will be where you put all your course work done during class. The second folder is where you will create and work on your projects.
Inside the weeks folder I also create a folder for each week - week1, week2, week3, etc. That way I have folders with code samples that line up with the course notes in this website.
iCloud and Git and Documents
Section titled “iCloud and Git and Documents”We will be saving all of our code inside the Documents folder. Apple, for various reasons (none of them financial I’m sure), likes to connect our Documents folders to iCloud. By default they want to backup the Documents folder.
iCloud and Git will conflict. Both of them monitor folders for changes. They do not get along well.
So, you will have to disable iCloud for your Documents folder.
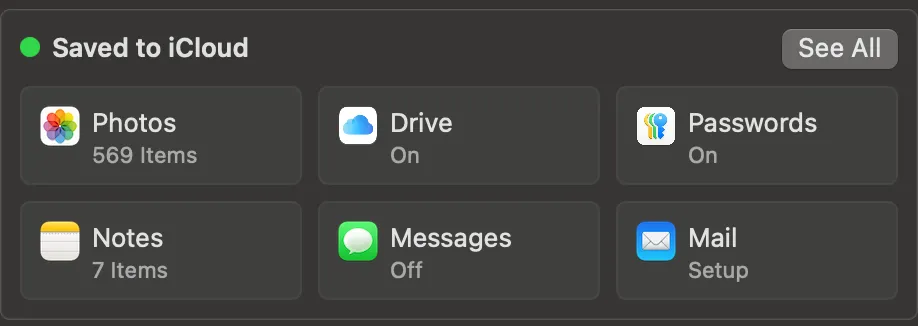
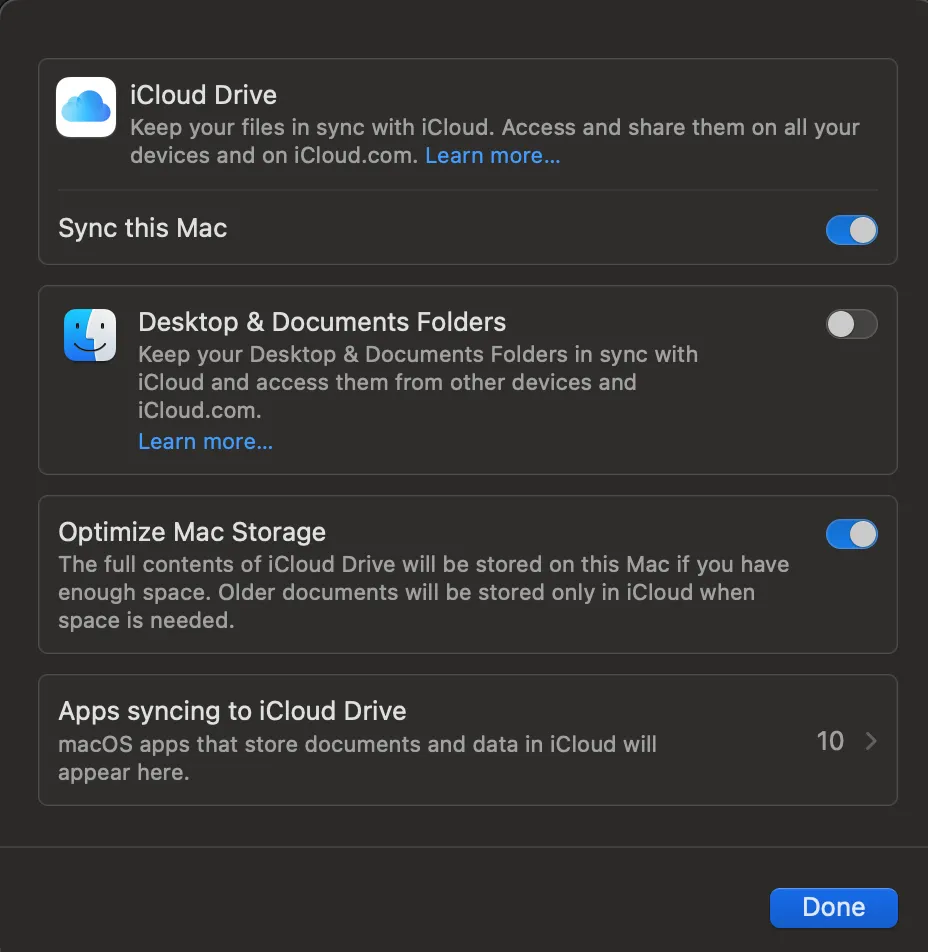
If you open your system settings on your Mac and then open the settings for Drive (in the first image). Then disable iCloud for Desktop & Documents folders (in the second image).
JavaScript in VSCode
Section titled “JavaScript in VSCode”For the first few weeks we will be using NodeJS and the Terminal inside VSCode to practice and learn the fundamentals of JavaScript.
You will need NodeJS installed, as per the instructions above.
With VSCode opened, our first step is always to open a project folder. Click on File > Open Folder and choose the folder that you want to open. Eg: Documents/code/mad9014/week1/.
Once your folder is open, VSCode has a reference point for all relative file paths in your project. In the left hand panel you will see the name of your current folder written in bold. If you mouse
over this name you will see icons appear for creating a new file or a new folder. Try creating a file called main.js.
Inside the editor area, where the file is opened, type the following.
console.log('Yeah science!');and then type COMMAND + S to save the changes to the file.
We will now open the Terminal that is built into VSCode. Go to Terminal > New Terminal or click CMD + SHIFT + ~. Either will open the Terminal window below the editor area.
The current folder location shown in the Terminal will be the folder that you opened as your current project folder.
In the Terminal area type:
node main.jsThis will use the node program to run your main.js script. You will see the message from inside the console.log() command written in the Terminal.
JavaScript Variables
Section titled “JavaScript Variables”Variables are a common feature in practically all programming languages. For a program to be able to run and accomplish a task, it needs to be able to remember things. Your program needs to be able to remember names, times, numbers, etc. A variable is how you do this.
You can think of a variable as an empty box. You would put your value inside the box and then write a label on the box.
To create a variable in JavaScript there are three keywords that we can use.
var old;//var is the original keyword that doesn't get used much any more but still works.//When var is used it will also create a property of the same name on the global object.//The global object can be window, globalThis, or global depending on where the js runs.
let name;//let creates an empty box to hold a value. `name` will be the label on the box.const PI = 3.14;//const creates an empty box that needs the value immediately.// //The box will be sealed so you cannot change what is inside.
The first two lines in this example we are declaring a variable. This is what the process of creating the storage space for the value and giving it a label is called.
The third line is declaring a variable and assigning a value to it. If you use const then you are creating a variable which is not allowed to be assigned a new value.
Assigning and reassigning new values can be done as much as you want with let and var. We will not be using var after today.
let name = 'Steve';//declare and assign can be done on the same line or separately.name = 'Alex';//reassignname = 'Joanne';//reassignNote: the double forward slash on each line indicates a comment. When a developer wants to make notes to themselves or their teammates, they can add the two slashes followed by a single line message.
JavaScript Primitive DataTypes
Section titled “JavaScript Primitive DataTypes”Some programming languages will insist that you tell them what kind of information is going to be stored in the variable and will only let you use that one kind of information in the variable after it is declared.
JavaScript lets you change the kind of information (DataType) at any point.
There are two groups of DataTypes in JavaScript - Primitives and Objects. If your datatype is not a primitive then it is automatically an Object.
Primitives are just a value.
Objects can have properties, methods, and/or events.
The primitive types in JavaScript are:
- String - any combination of characters wrapped inside quotation marks.
- Number - any numeric value between ((-2 ^ 53) -1) and ((2 ^ 53) - 1), with or without decimals.
2^53 is (9,007,199,254,740,992). A HUGE number.
- Boolean -
trueorfalse. - undefined - the value that a declared variable holds until it gets assigned a value.
- null - an empty value that a developer can assign to a variable to reflect that there is nothing inside.
- Symbol - represents a value that is guaranteed to be unique. To be discussed later.
- BigInt - holds numbers that are outside the normal
Numberrange.
If a variable does not hold one of those things then it is automatically an Object.
There are different kinds of Objects and we will be talking about those starting in week 2.
Here are a few examples of variables being declared with different primitive values.
let name = 'Steve'; //Stringlet alive = true; //Booleanlet price = 123.95; //Numberlet favouriteColor = null; //nulllet someValue; //undefinedlet list = ['Tony', 'Adam', 'Tilan', 'Steve', 'Nehmat', 'Tim', 'Adesh'];//Array Objectlet person = { id: 456, email: 'alex@work.org', department: 'Design' };//Objectlet today = new Date(); // Date Object